Note-taking meets excellence
NOTABILITY FOR WINDOWS
Notability is one of the popular note-taking applications for Apple devices. While its exclusive Apple availability makes it exciting among the Windows note-taking fraternity, its stunning features make it one of the most downloaded notetakers on iOS, iPadOS, and macOS. These reasons encourage thousands of Windows users to look for Notability on their Windows computers. But is it possible? Does it work? If yes, how? We’ll answer all these questions here.
Need help? Write to us
WHAT IS NOTABILITY?
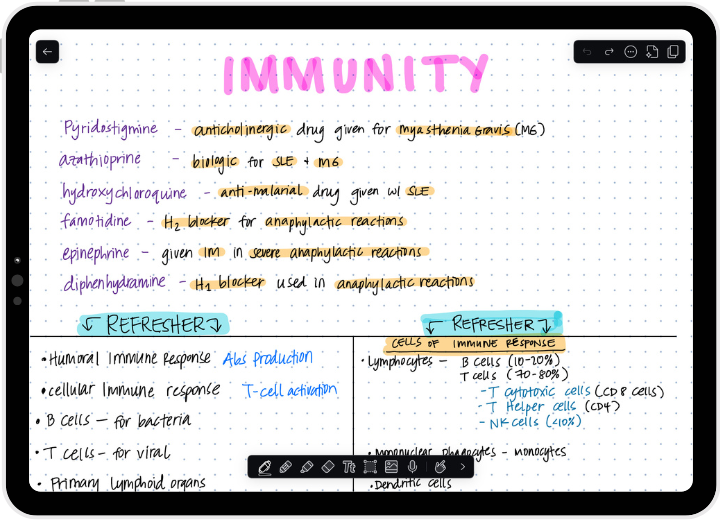
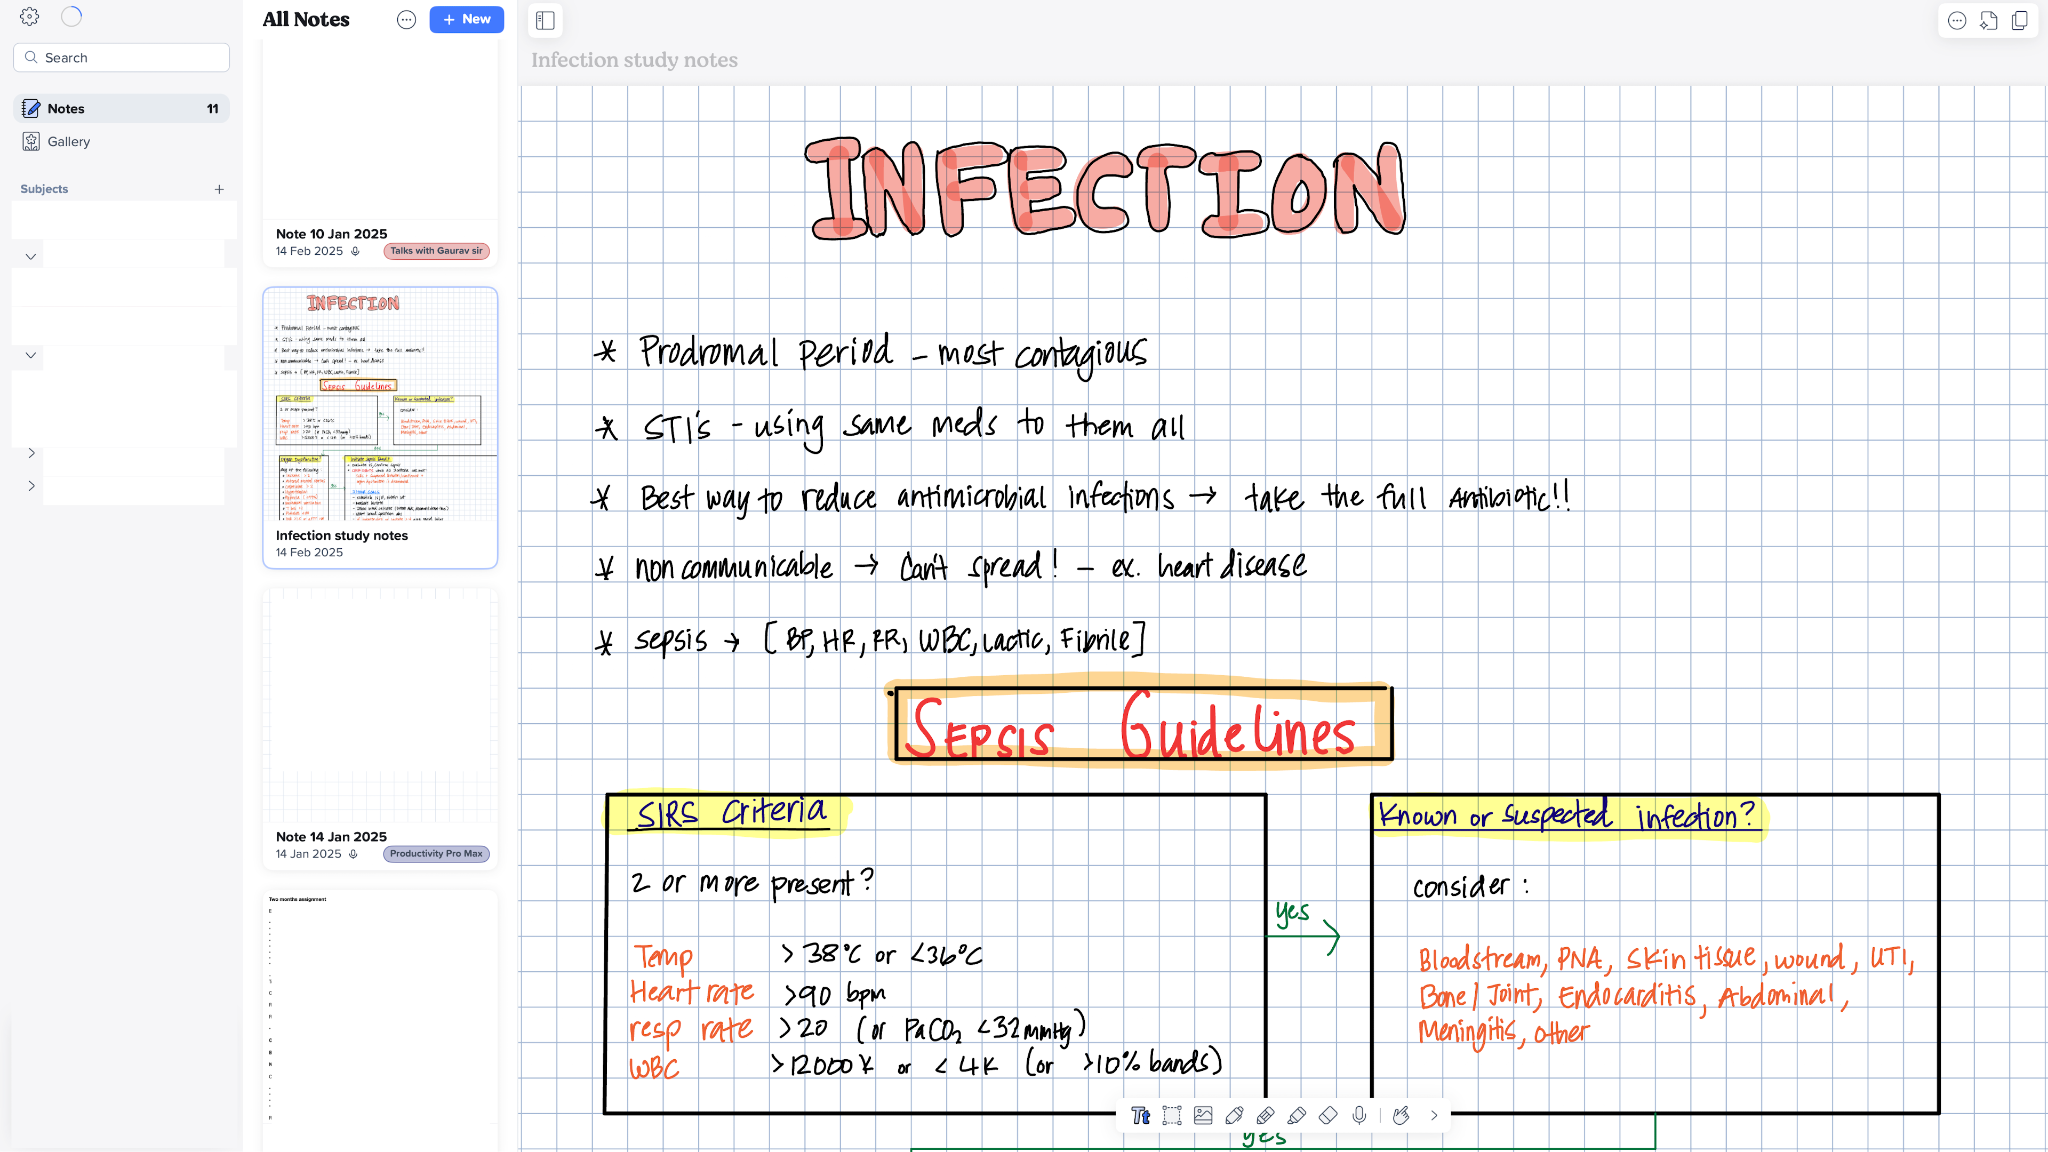
It is a note-taking application for iOS, iPadOS, and macOS that allows users to type, draw, and create handwritten notes categorized into Subjects and Dividers. Launched in April 2010 by Ginger Labs, Notability is one of the most downloaded note-taking applications. The app comes loaded with features such as AI summaries, Pencil sensitivity settings, lasso tools, and a large number of templates that allow notetakers to efficiently document and share notes with their peers.
WHY SHOULD YOU USE NOTABILITY ON PC?
- Create and edit notes
- Categorize with Subjects and Dividers
- Set Note reminders using Safari
- Summarize your notes with Notability Learn
- Turn your notes summaries into engaging Quizzes
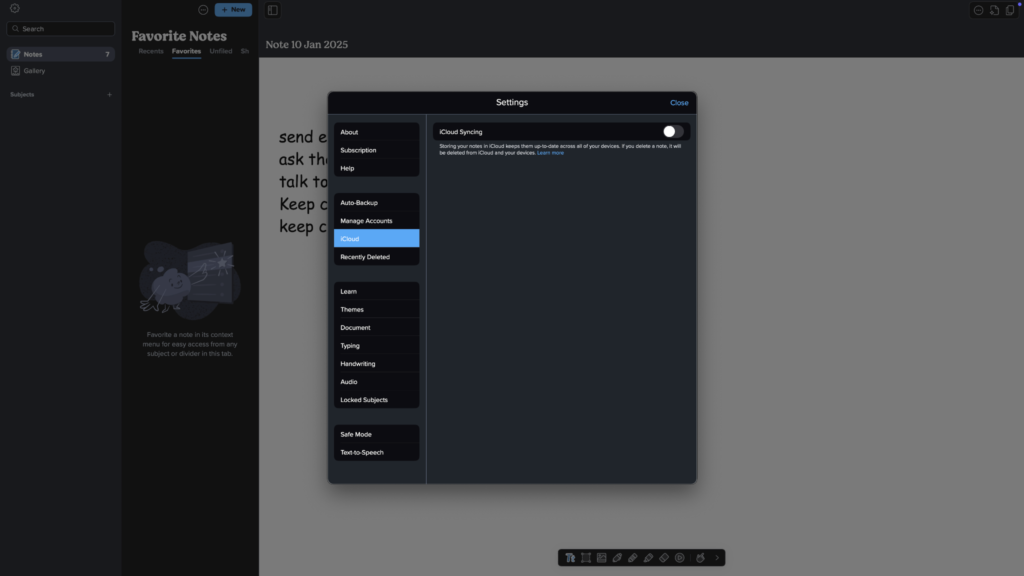
- Incredible iCloud sync
- Add images, videos, GIFs, stickers, and sticky notes
- Import audio recordings or record live audios while making notes
- Transcribe audios
- Lock Subjects to secure your notes data
NOTABILITY PC SYSTEM REQUIREMENTS
To install and use Notability on your Windows laptops, your system should fulfill the following hardware and OS requirements.
| Component | Requirement |
| Operating system | Windows Vista, 7, 8, 10, 11 – 64 Bit Recommended- Windows 10/11 |
| Processor | Intel Core i3 3.90 GHZ or better AMD Ryzen 3 or better |
| RAM | 8 GB for installation |
| Free disk space | 80 GB for macOS, at least 2.5 GB for the app and its files |
| Audio devices | Any standard device can work. |
| Graphics | Intel HD Graphics 5000 or later NVIDIA GeForce GTX 700 or later AMD Radeon R5 or later |
HOW TO INSTALL NOTABILITY ON WINDOWS?
To install Notability, you need to first set up a virtual macOS inside a VM such as VirtualBox. Here’s a step-by-step guide for VirtualBox and macOS setup on PC.
Phase 1: Install macOS
Installation Files
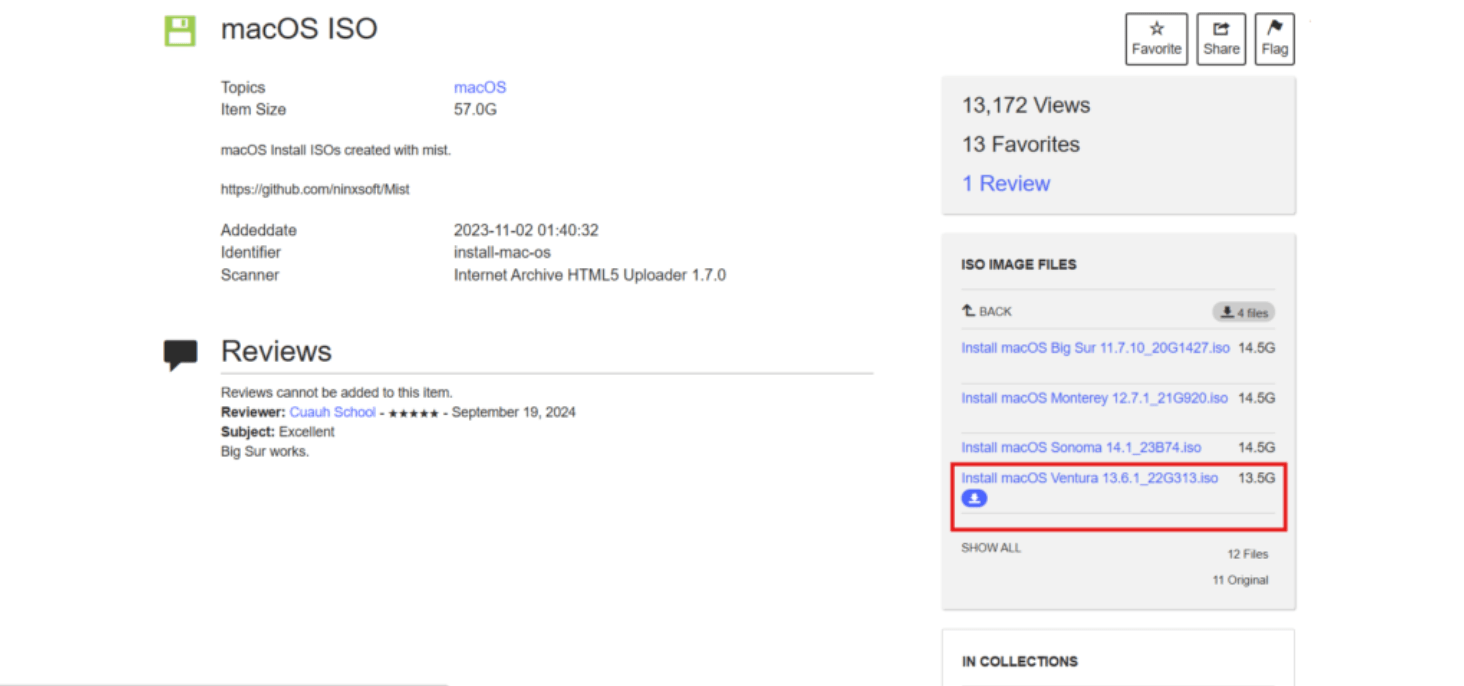
Step 1: Go to the Internet Archives website and download the macOS ISO file.
Step 2: Download VirtualBox Windows Hosts from Oracle’s official website.
Step 3: Open the VirtualBox Installer and complete your installation.
Step 4: Go back to the VirtualBox Downloads page and click “Accept and Download.”
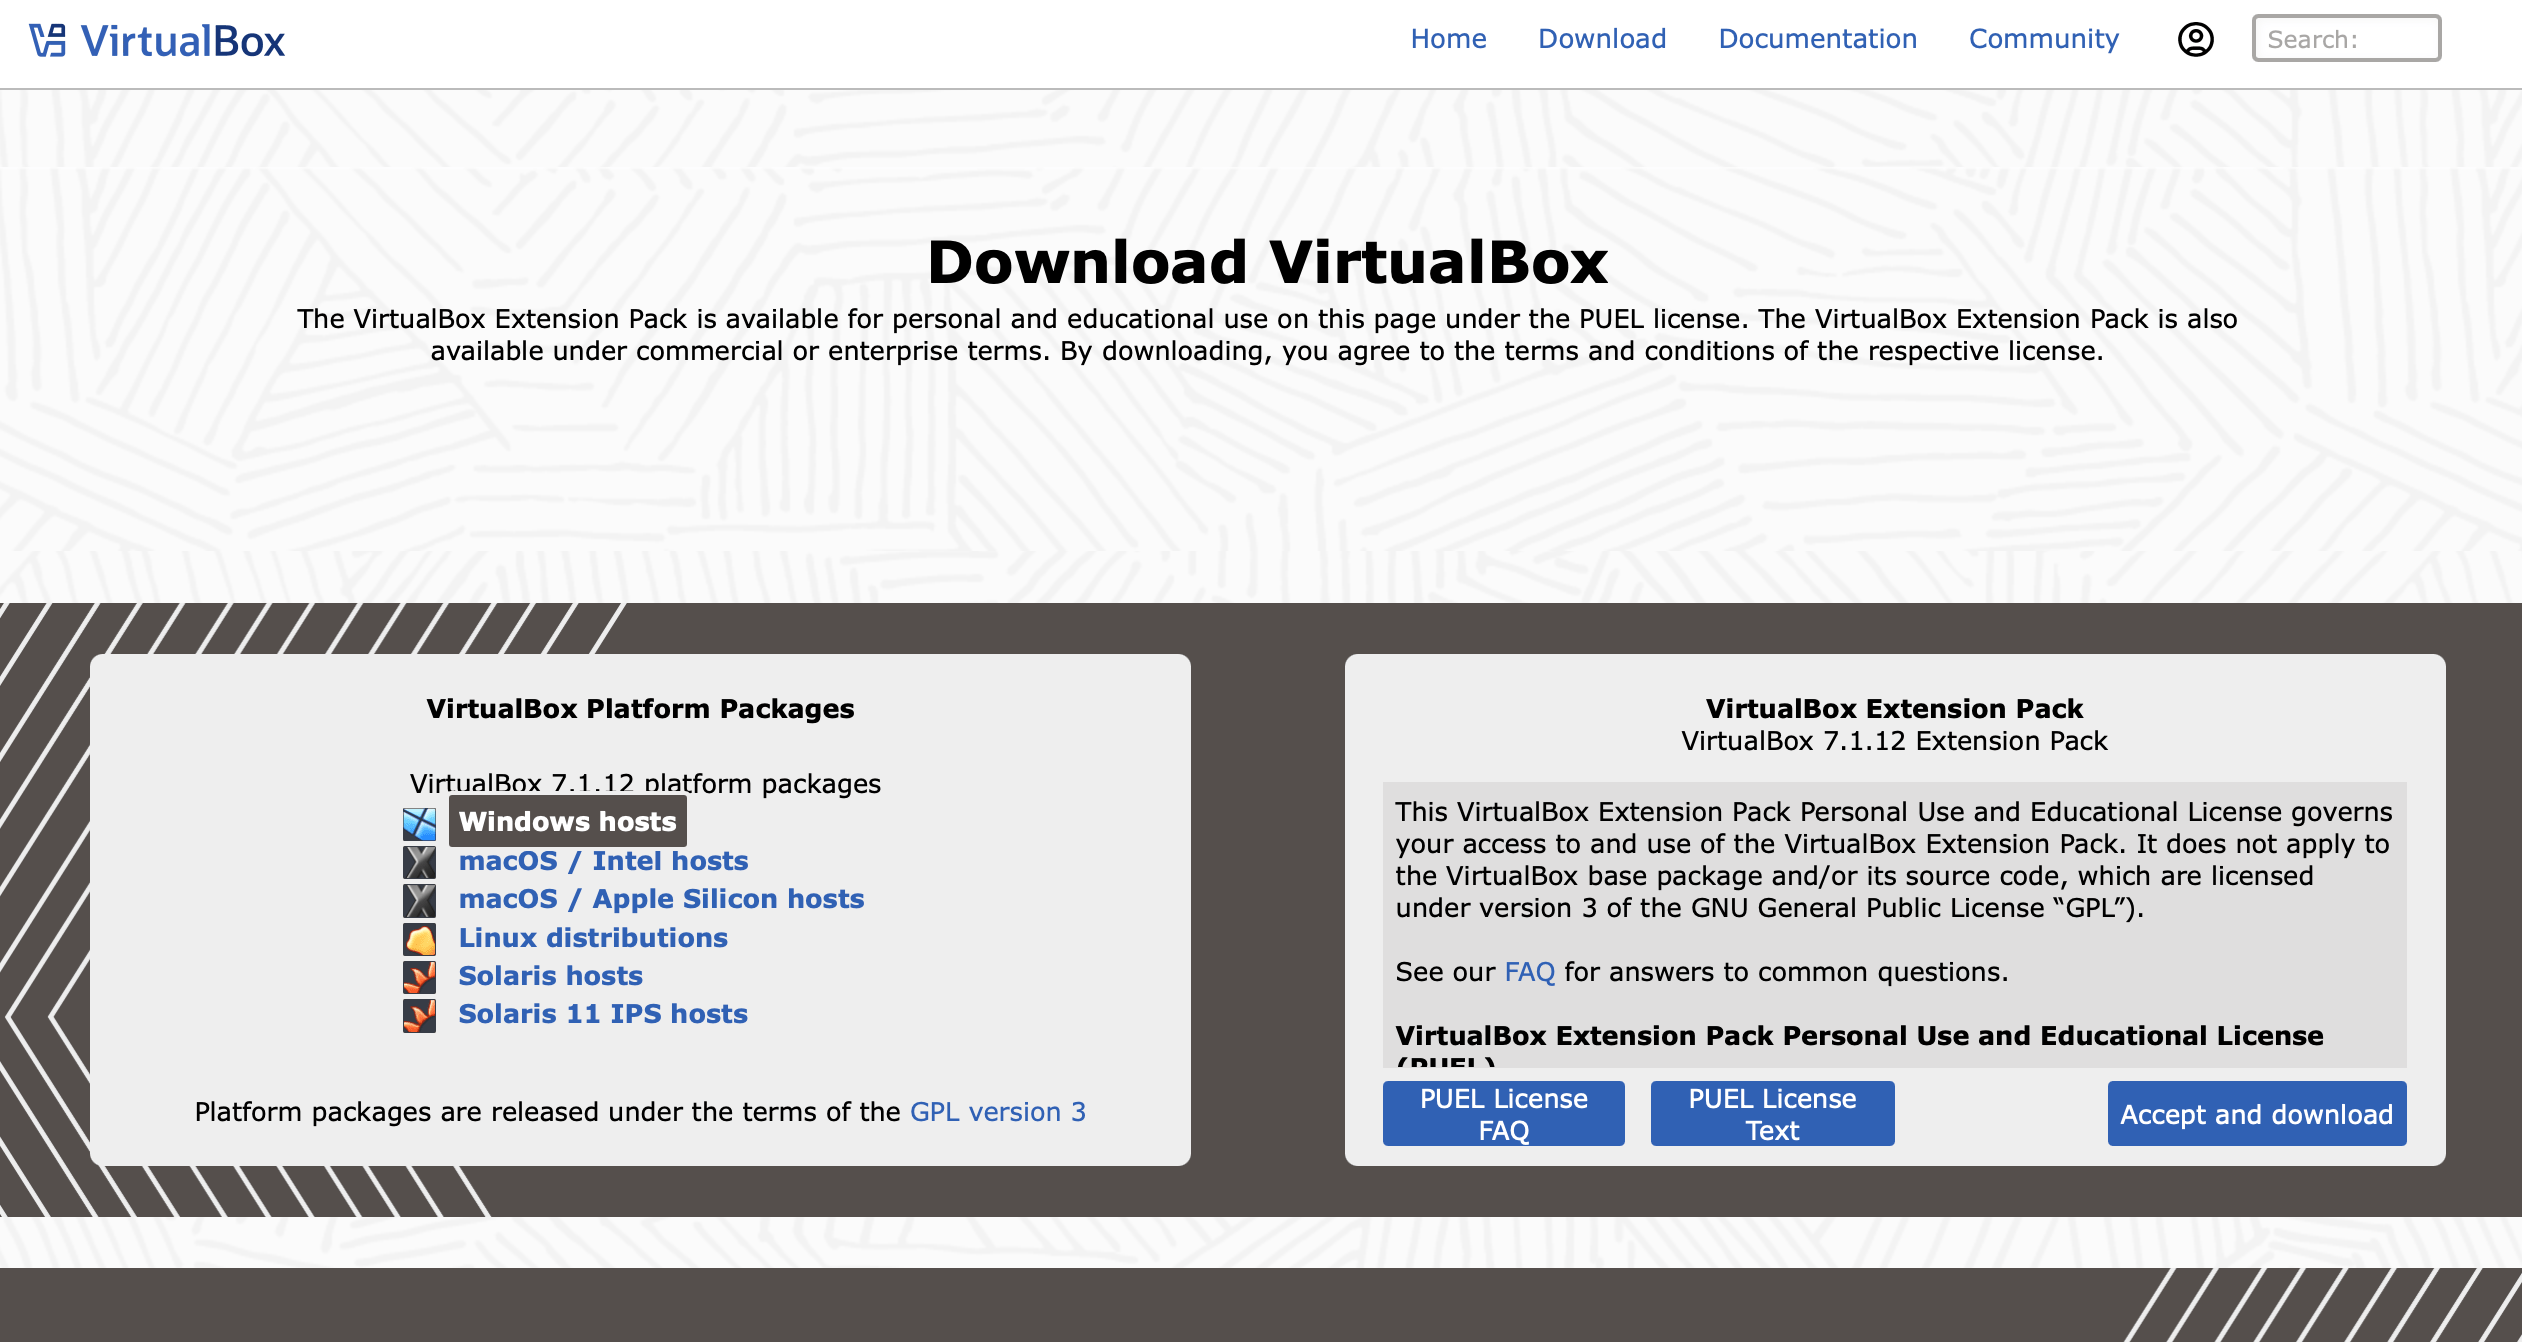
Step 5: Install the VirtualBox Extension Pack.
Solve the virtualization conflicts
VirtualBox is a virtualization software, launched by the parent company Oracle. While this tool will allow you to use your Windows laptop as a part-time MacBook, one challenge while installation can crop up due to Microsoft’s very own virtualization software- it is built-in on your Windows 10 and Windows 11 computer- YES!
Windows Hyper-V is a Microsoft owned virtualization tool that allows Windows users to access other operating systems such as Linux, Windows, Windows Server, Ubuntu, and a few others. However, being a Microsoft product, Hyper-V does not support macOS- for this reason, we need a third party virtaulizer such as VirtualBox.
But, since, Hyper-V is active on your computer, it may cause conflicts as you try to use macOS inside VirtualBox. To solve this concern, we disable Hyper-V and proceed with our installation.
Don’t worry- it will not hamper with your computer’s hardware, software, or firmware- it’s just a Microsoft application that we are removing since, we don’t need it. So, let’s get to the process-
Step 6: In the Windows search bar, type “Windows Security” and open it.

– Now, go to “Device security”
– Click on “Core isolation details”
– Switch off the “Memory integrity” toggle
Step 7: Go to the search bar again and type “Command Prompt”
– Right click on the command prompt icon and select “Run as administrator.”
– Copy and paste this code in the Command Prompt and hit enter.
Bcdedit /set hypervisorlaunchtype off
Command prompt will show this message- “The operation completed successfully.”
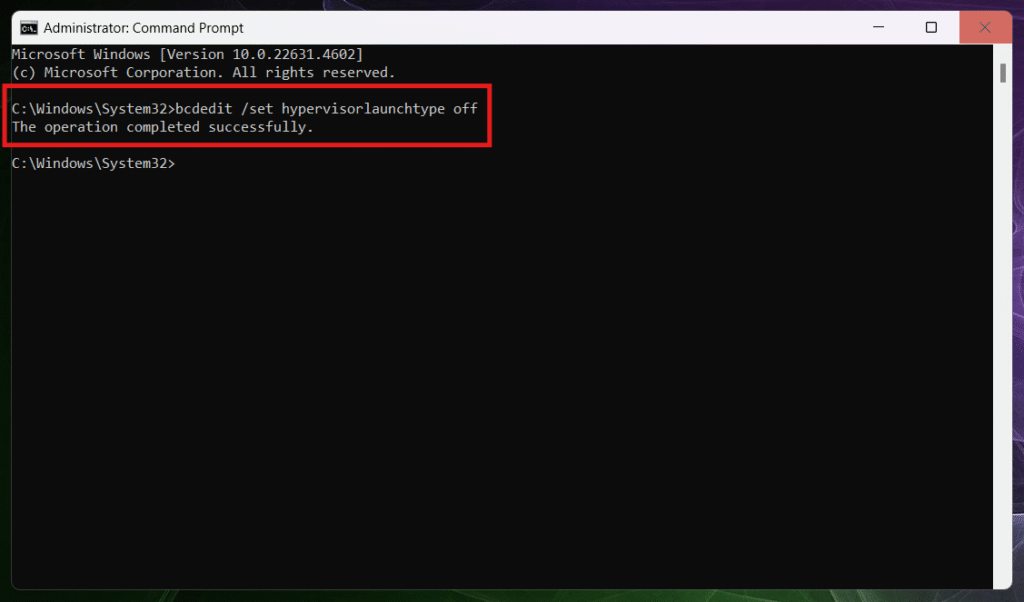
Restart your computer to completely disable Hyper-V.
macOS installation in VirtualBox
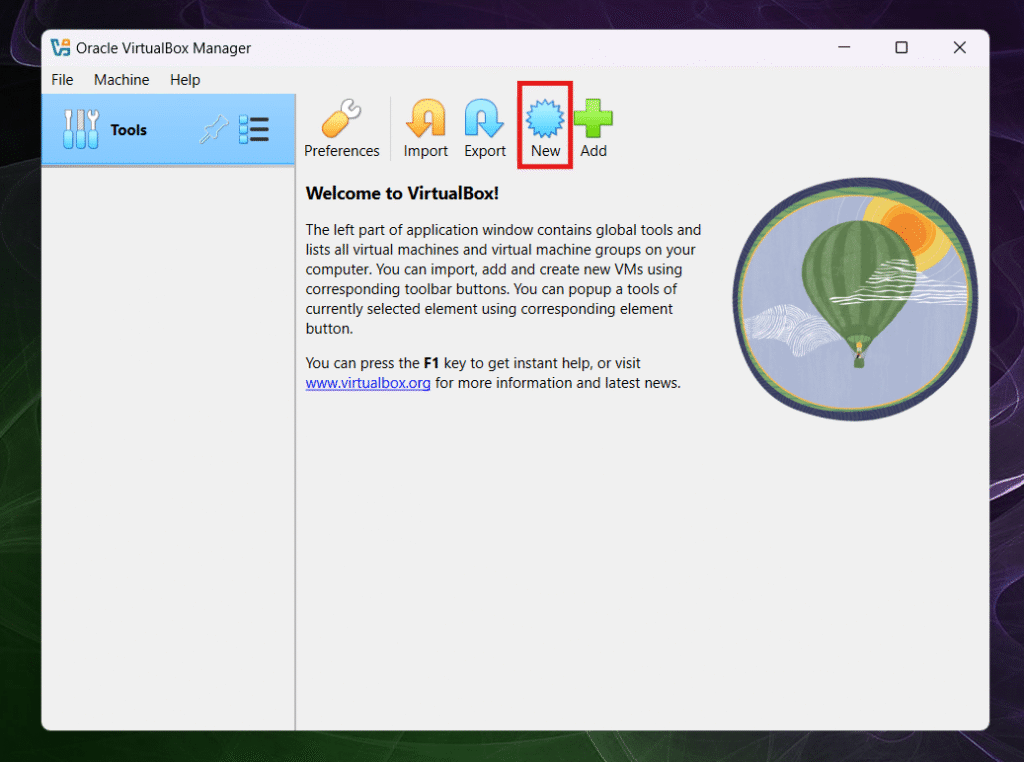
Step 8: Open VirtualBox
– Click on the “New” button
– Name this installation, pick your ISO image file, select the Version (Mac OS X (64-bit)), and click on “Finish.”
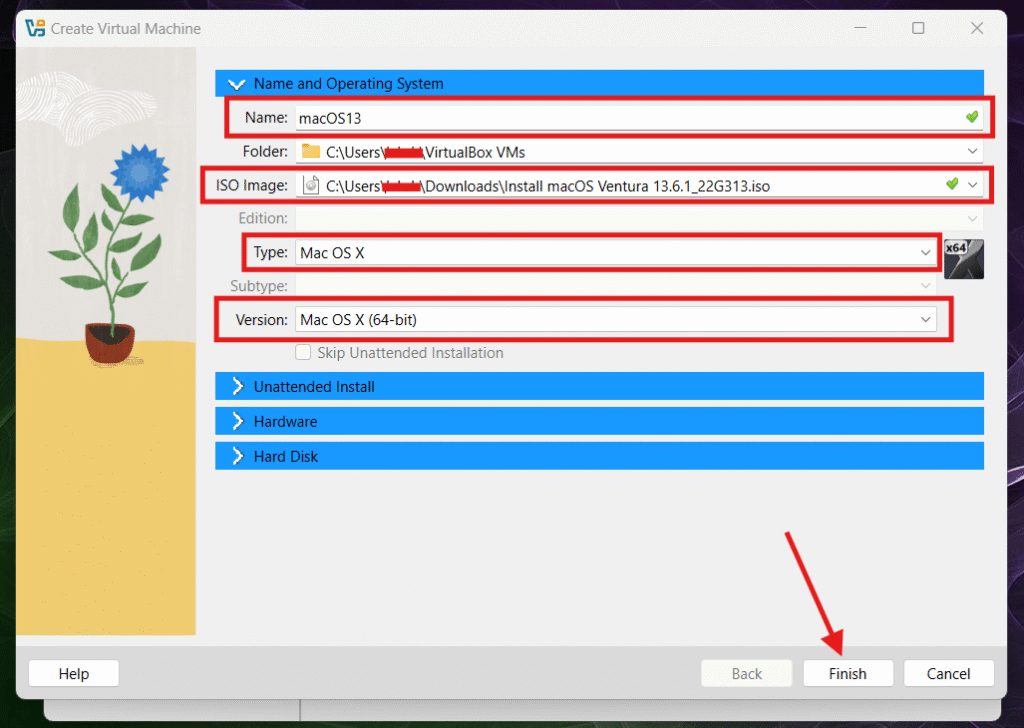
– Now, allocate the storage space for your macOS installation (I suggest at least 80 GB for optimum performance).
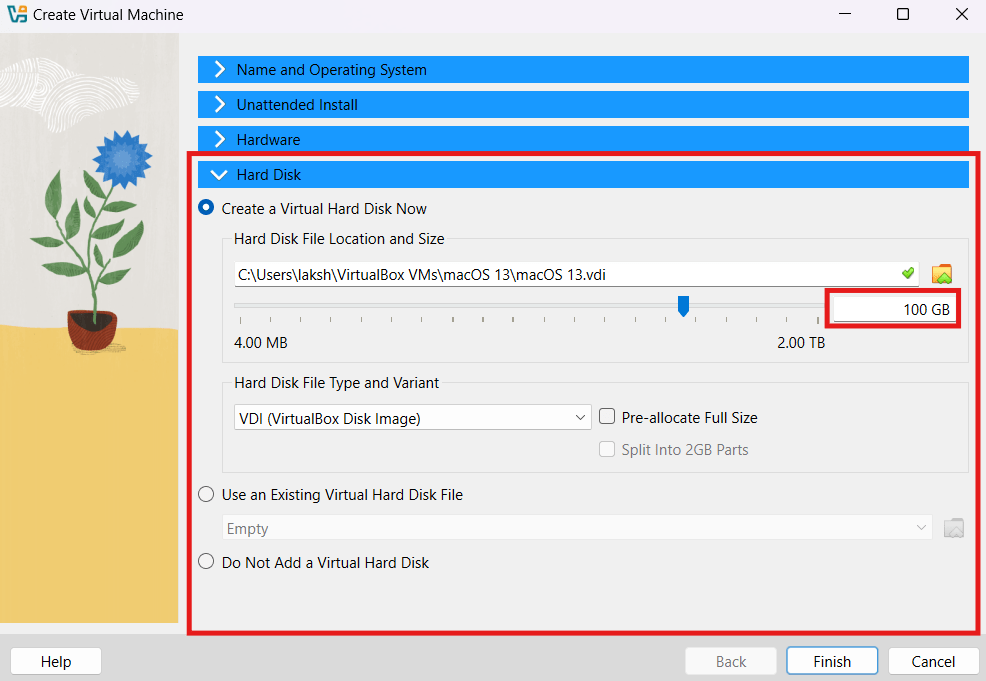
– Click “Finish” and move to the next step.
Change Audio, Display, and WiFi Settings
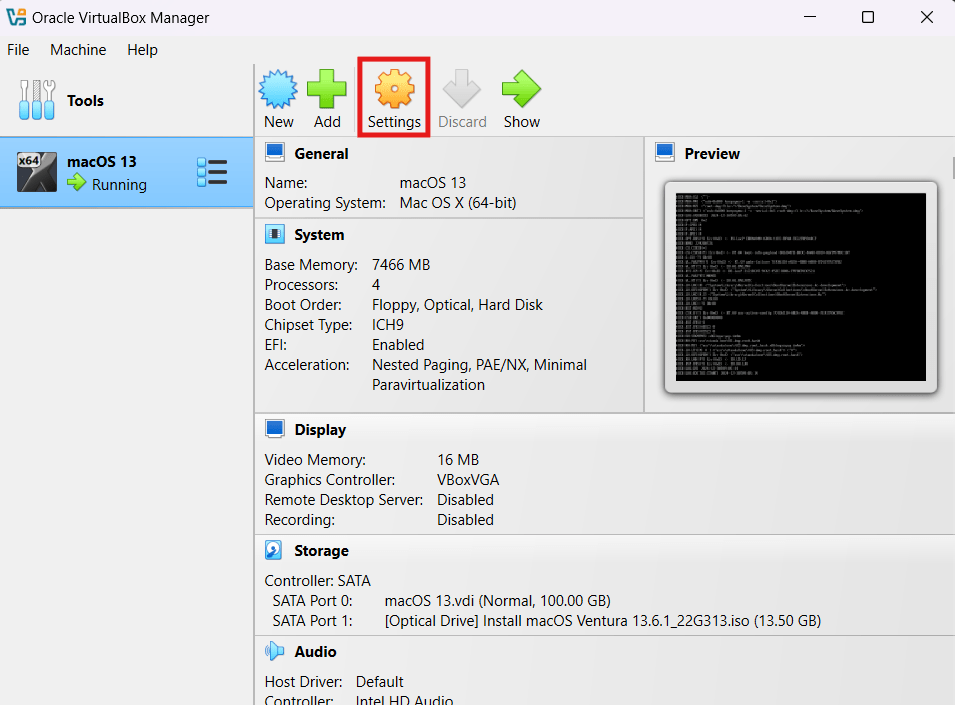
Step 9: Launch the VirtualBox
– Click on the “Settings” icon.
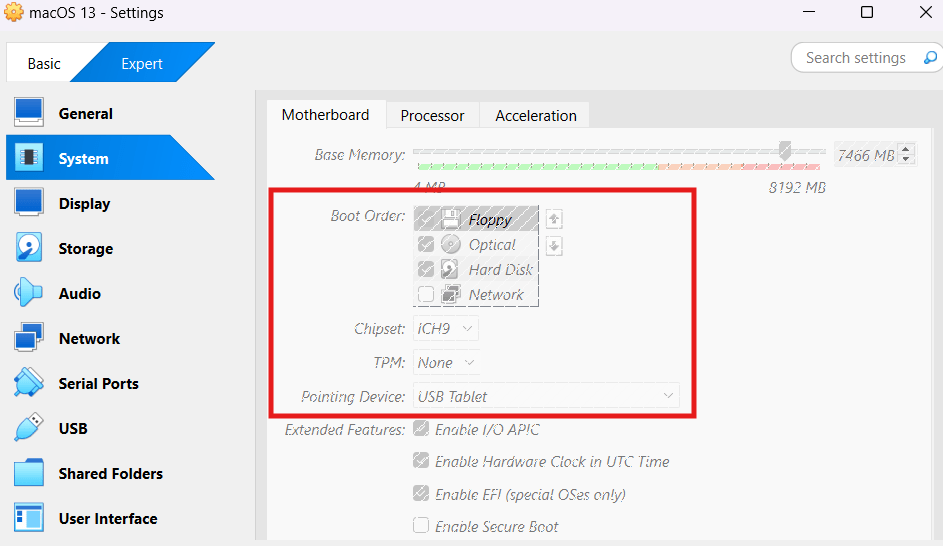
– In the “System” tab, set the chipset to ICH9 and enable EFI check so your macOS boots quickly.
– Go to Display settings, set Video Memory to 128 MB, and Enable 3D Acceleration
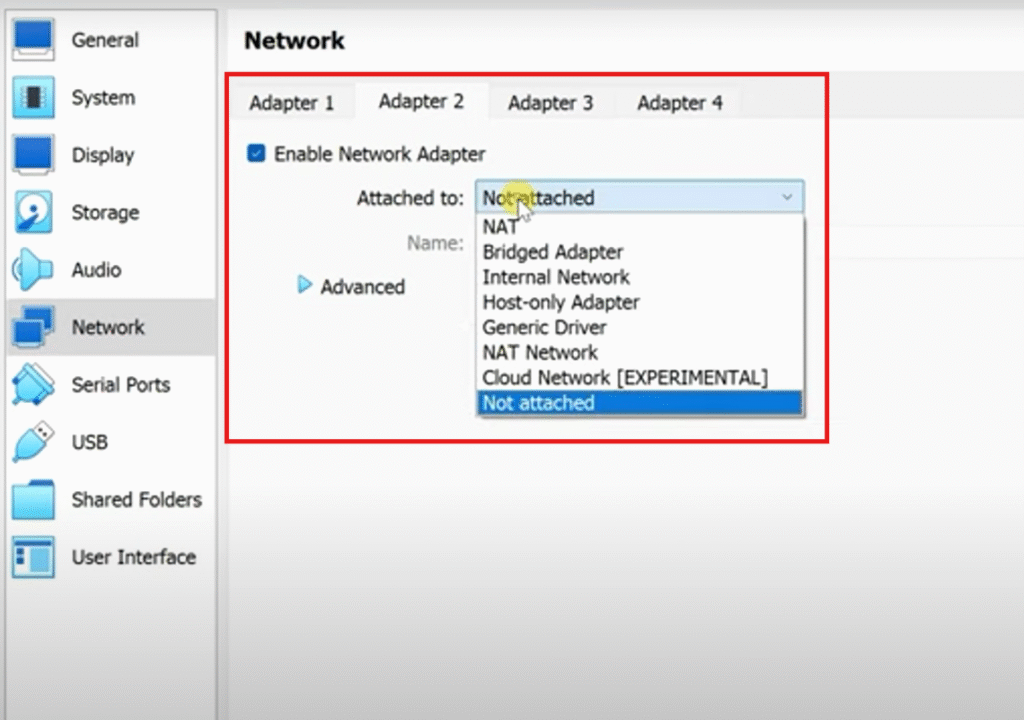
– Now, go to the “Network” tab > select “Adapter 2” > “Enable Network Adapter” and pick your adapter from the “Attached to” menu.
Fix any remaining bugs
Whenever a new version of a software is released, it is supposed to solve problems in the previous version. However, this can often lead to minor new bugs that may hinder your usage experience. Similarly, the version of VirtualBox and macOS ISO files that you download may have a few bugs that may limit your virtual machine’s performance. To avoid this, I recommend patching your virtual machine- this works like applying super-glue that holds your VM and macOS close, filling any technical gaps that may lower your OS’ performance.
To successfully patch your virtual machine, you will need a set of codes that go in the command prompt to patch your VM. You can find these codes easily on various reliable computer discussion forums or Reddit threads. I usually get mine from the Internet Archives website- you can check if the codes for your computer are available there. Just make sure to get them from a reliable source, since, the wrong codes may make undesirable changes to other programs on your computer.
Once you find the codes-
Go to the search bar > search Command Prompt > right click and “Run as an Administrator” > paste these codes and hit enter.
The final steps for installation
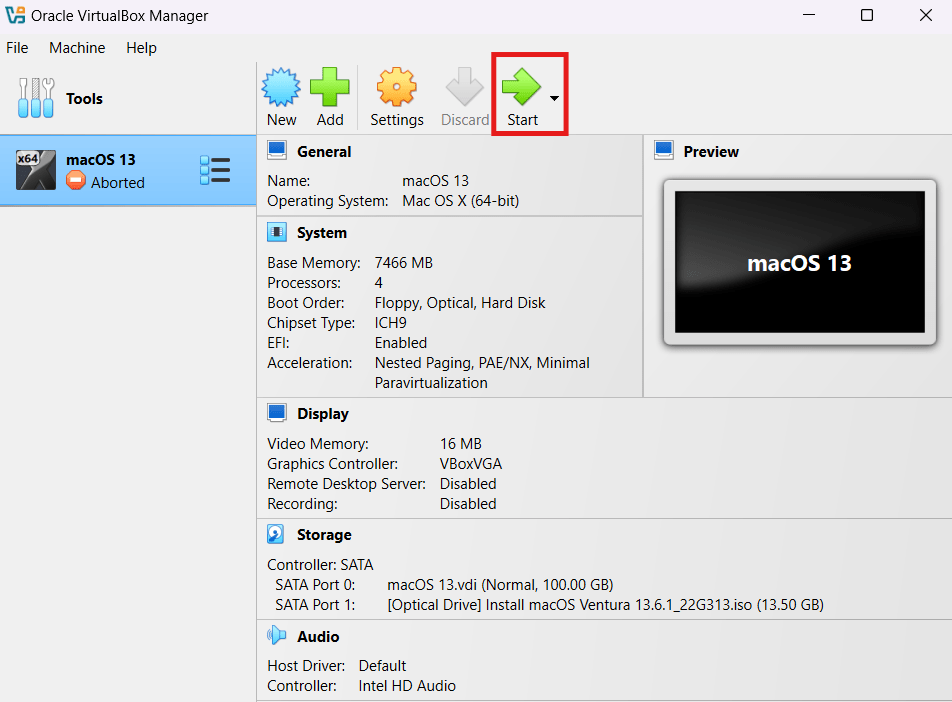
Step 11: Click “Start.” Now, a script will start running, so, wait for it to finish.
Step 12: The Apple logo will appear
– After the Apple logo disappears, you will be asked to select your preferred language. Pick your language and click on “Disk Utility.”
– Select VBOX HARDDISK Media and click on the erase button in the top bar
– Rename the drive and click Erase
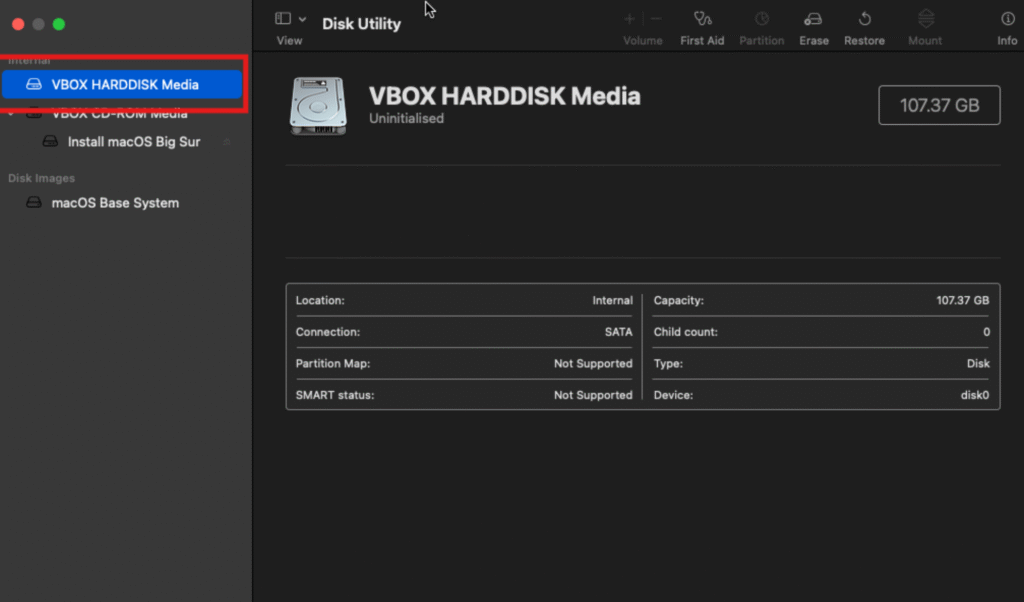
– Close Disk Utility, and click on “Install macOS”
– Follow the on-screen instructions to finish the installation process.
This can take 30 to 50 minutes to complete, so, let it finish. After the installation, your macOS will start.
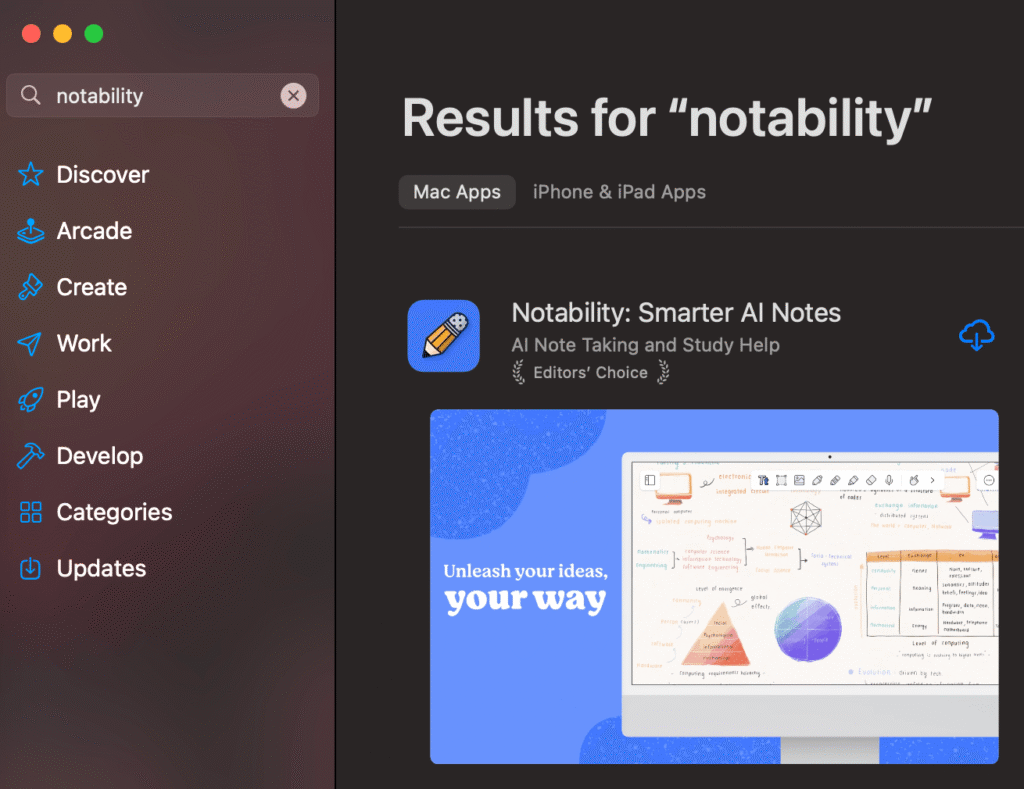
Phase 2: Now we’ll install Notability on your computer
Once you have logged in using your Apple ID, you can visit the macOS App Store, search Notability, and download it.
WHAT MAKES NOTABILITY THE BEST?
So far, we have discussed a bunch of Notability features along with an installation method that works even for Windows computers. However, these alone don’t make it an Editors’ Choice on the App Store.
Learn has to be the top unique feature that powers-up Notability for students and working professionals.
Once you have made a note with enough content in it (at least three to four pages), you can use Learn to summarize these notes using the app’s generative AI. The summary will be short, precise, and easily comprehensible. Plus, after you’ve gone through the summary, the app will ask whether you wish to take a quick Quiz based on the notes (summary) you just went across.
Everyone has different handwriting and notetaking habits. To suit your specific needs, Notability allows you to adjust line and grid spacing of their notes. To do this, follow these steps:
Open a note of your choice > Settings > Template Settings > Drag the bar to change the line and grid spacing to suit your handwriting.
The Notability community is huge and regularly publishes new note templates to encourage users to be more productive while making notes.
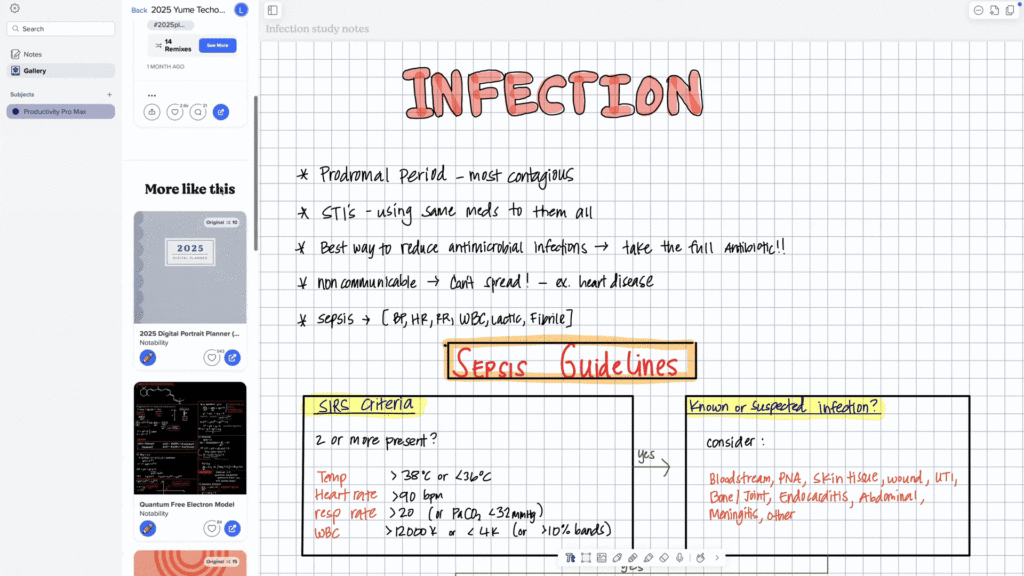
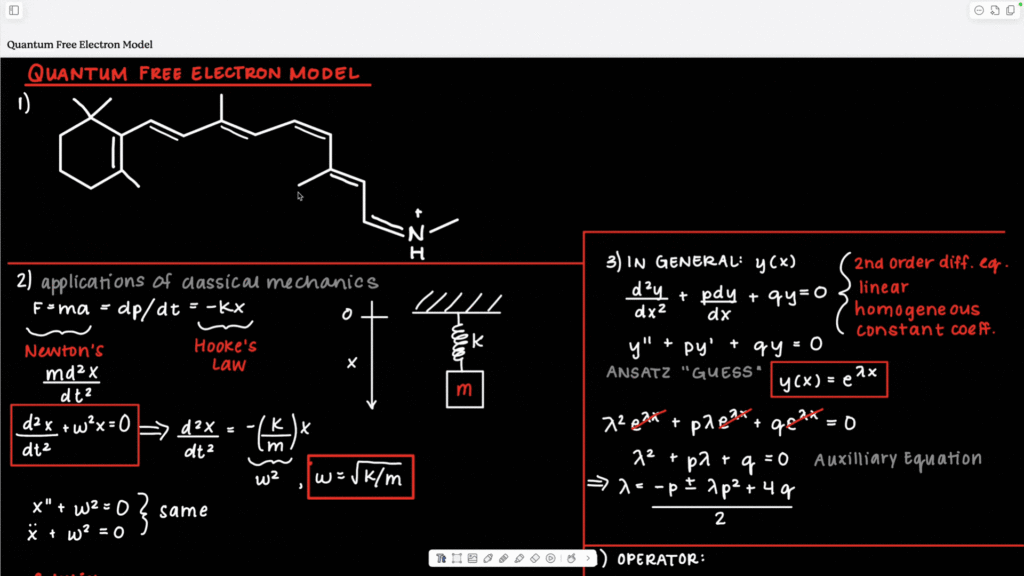
You can use these templates as bases for your unique study material, research work, or note-taking. One of the best things about these templates- some of them are SUPER AESTHETIC!
Sticky Notes always make life, work, and study easier. Notability comes with an in-built Sticky Notes feature that allows you to quickly take stickies and paste them on screen, so forgetting is never an option.
To use Sticky Notes in Notability, you can-
Open a new or existing Note > Click to add media > Click on the Stickers icon > Click on a Sticky Note to add it to your Notes
NOTABILITY USERS DON’T SWITCH
Notability has made note-taking and notation management so easy for me. I and my students are now able to focus on music making and practice, instead of toiling around notes-management.
Adam Brown
Music Tutor
The PC version of Notability has made my life so easy. While I used to love taking handwritten notes and sketches on Notability on my iPad, being able to sync them on my laptop has solved so many problems for me.
Mellisa Silva
Fine Arts student
START YOUR NOTABILITY JOURNEY!
NOTABILITY ALTERNATIVES FOR WINDOWS
Windows users unable to set up a virtual machine can consider using these note-taking apps.
Notion is among the most popular and widely used latest-gen notetaking applications, which is loaded with features, flexibility, and utility. While it can come off as overwhelming or tricky to start with, it keeps getting easier, and more productive and fun once you start using it. My personal favorite feature of Notion- creating a new page/gallery/callout/text box or even a database without having to move the mouse; at all.
Notion has a “Forward Slash” tool (/) which gets triggered when you input forward slash “/” on any dashboard. After entering “/,” you can start writing the name of the block you wish to add. For example, to add a new page, type the command “/page” and hit Enter. This will create a new page.
Google Keep is another popular notetaking app available with web and OS app versions. You can access “Keep” by visiting keep.google.com and signing in using your Google account. This tool is perfect if you are looking to simplify the notetaking process on your PC and to sync those notes on your mobile devices and tablets. Since Google Keep works with a Google sign-in, it syncs automatically across all devices. Furthermore, you can categorize your notes using Labels, and attach Reminders to the Notes of your choice. Google Keep also has the option to Archive the notes that you aren’t using actively and access them later when you need them.
Goodnotes is popularly known as one of the direct competitors of Notability. Its generative AI, easy notebook management, and a competitive pricing model attract notetakers from across all fields of study and work. Priced at $9.99 for a year or $29.99 for a lifetime access, Goodnotes makes notetaking more fun, aesthetic, and efficient. Its lasso tool, pressure sensitivity and stroke stabilization settings for pens, a large number of Notebook covers and lines & grid options make it a favorite among notetakers using both Windows and Mac computers.
One of the oldest notetaking applications, Evernote has long been popular among the research fraternity. However, that’s not all- its potential can empower all notetakers, whether studying or working. Available with four subscription options: Free, Personal, Professional, and Teams, Evernote offers something for everyone. Also, the latest updates have equipped Evernote with the Forward Slash tool, making notetaking and dashboard building easier than ever.
FREQUENTLY ASKED QUESTIONS
Windows users can access Notability by installing a virtual machine or renting a cloud Mac on their computer. VMWare and VirtualBox are two of the most popular virtualization tools that allow easy macOS setup on Windows. However, to avoid the technical installation process, you can rent a cloud Mac from MacInCloud for as low as $20 a month and start usign Notability right away.
Notability is available on iOS, iPadOS, and macOS, which means that iPhone, iPad, and Mac/MacBook users can use Notability on their Apple devices. Furthermore, Windows users can use Notability by setting up a Virtual macOS on their Windows computers with the help of VirtualBox, VMWare, or by renting a cloud Mac from a service like MacInCloud.
Goodnotes and Notability are both great notetaking tools, with several pros and a few cons on both sides. However, speaking of usage on a Windows PC, Goodnotes is available on Windows, while Notability can be installed inside a Virtual macOS on your Windows computer. Notability Learn, Sticky Notes, and Notability Gallery are some of the major features why you may want to install macOS on your Windows PC and use Notability on it.
Notability has a free version and three Premium versions that cost as follows:
- Notability Lite (Annual): $14.99
- Notability Plus (Annual): $19.99
- Notability Plus (Monthly): $4.99/month
OUR BLOG
How to Sync Notability Across Different Apple Devices?
Linda Madden
If you are a user of the Apple devices (Mac, iPhone and iPad) then you …
Read more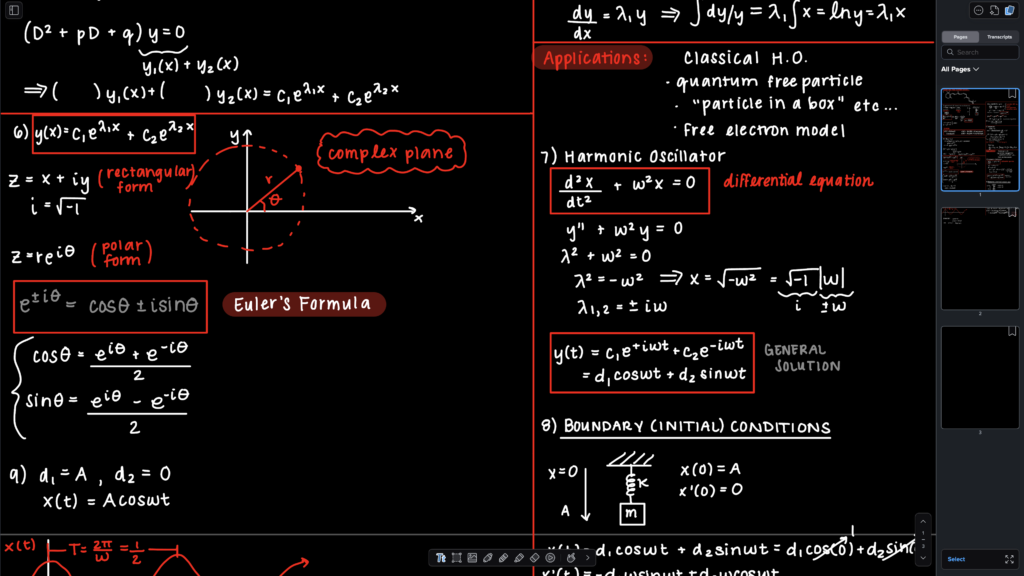
How to Add a Page in Notability?
Linda Madden
Notability is a useful note-taking app. Its minimalistic interface encourages users to use it without …
Read more
OneNote Vs Notability- Which is the Best Note-taking App?
Linda Madden
Choosing between OneNote and Notability can be tricky- especially, because they both offer a great …
Read moreRECEIVE OUR LATEST BLOGS & GUIDES
All the latest updates, delivered right to your inbox, with exclusive Notability templates.