When we talk about digital note taking on an iPad, only a handful of apps offer quality- Notability is one of them. If you are an avid iPad note maker, you may have heard its name or may be wondering how to use it.
It’s not rocket science. However, many of its features may come off as new or tricky to wrap your head around. Learning about these features can make note taking a lot easier and efficient for you. And in this blog, you’ll find out all about how you can use Notability to make the most of it, so, let’s start.
Exploring and Understanding Notability’s Features
App Interface Overview
After opening the app you will see an interface like this:

Gear icon and search bar: In the top left corner, you will see a gear icon that allows you to manage advanced settings and customization options. We’ll come back to it later. Below the gear sign, you can see a search bar, where you can search different notes.
Notes section: Below the search bar, there is a notes section, where you can find all your notes.
Gallery: In the gallery, you can find multiple readymade templates. For example, if you need a planner, you can find a pre-made template that you can use to plan your tasks. These templates are made by other members in the Notability community. You yourself can also design such templates and share with other members.
Apart from that, you can change the subject and divider order, rename these properties, convert a divider into a subject and vice versa by simply dragging and dropping.
How to Create a New Document?
To create a new note, you can click on the “+ New” button at the top right corner. After clicking, you will be asked to choose the paper pattern, example, grid, rule, plain, etc, or use an existing template or import a new one from your gallery or the Notability community.
Understanding the Tool Box
After opening a note you can see a customizable toolbox like this.

After you click on the arrow you will see these tool options:
![]()
You can drag and drop the Toolbox to place it anywhere, up, down, left, right.
You can find the following tools inside the Notability Toolbox-
Pen, pencil, and highlighter
Tap the pen, pencil, or the highlighter tool, depending on what you wish to use. To customize the tool’s settings, you can tap on it again. This will display the options such as color, style, and thickness. The pencil has pressure sensitivity and texture features for drawing purposes.
Eraser
You can find two types of erasers in Notability:
- Whole eraser: This erases the whole item/element
- Partial eraser: This erases only a specific detail.
For precise use, you can also resize your eraser by tapping it twice.

Text Box
To type text into a Notability document, click on the Text button (Tt) and then click that part of the page where you want to add text.
This will create a text box inside the page and then you can type into it.
Lasso Tool
This is a good feature that allows users to work on a selected section (Boxed or Freeform) in the following ways:
- Convert selected items to text and math
- Change the style (thickness, color, etc)
- Delete a selected portion
- Save items in the form of stickers
- Duplicate selected parts
- Move the selected item to the entire page or across other pages

Media
With this option, you can insert different media files into your notes. You can add photos from your gallery or directly click pictures from your camera and add them to your document. Along with this, you can add existing stickers or can make your own stickers by lasso selection tool and save them as GIFs.

Audio Recording
You can use this option by clicking on the mic icon while taking your notes from lectures and meetings. Recording replays sync with your writing and you can also make your audio transcripts by enabling the audio transcript option from settings (by default it is enabled).
Hand icon
This option allows your pencil to be used to drag up and down your paper.
Zoom
The Zoom feature allows you to zoom in on a particular section in your note to do more precise work.
Laser Pointer
You can use this to draw attention to particular points while giving presentations in meetings or lectures. You can also change the thickness and color of the pointer.
Tape
This is a very unique feature. I am really impressed with this feature. By using this you can hide your important data or information which you are finding very difficult to remember, after clicking on the tape information will be revealed.
You can use this as an active recall every time when you open the note information if you think the answer in your mind and click after guessing this will help you to memorize this key information.
Ruler
This is used to make precise straight lines and angles.
Advanced Settings and Customizations
If you click on gear icon present on upper left corner you find many important settings, such as:
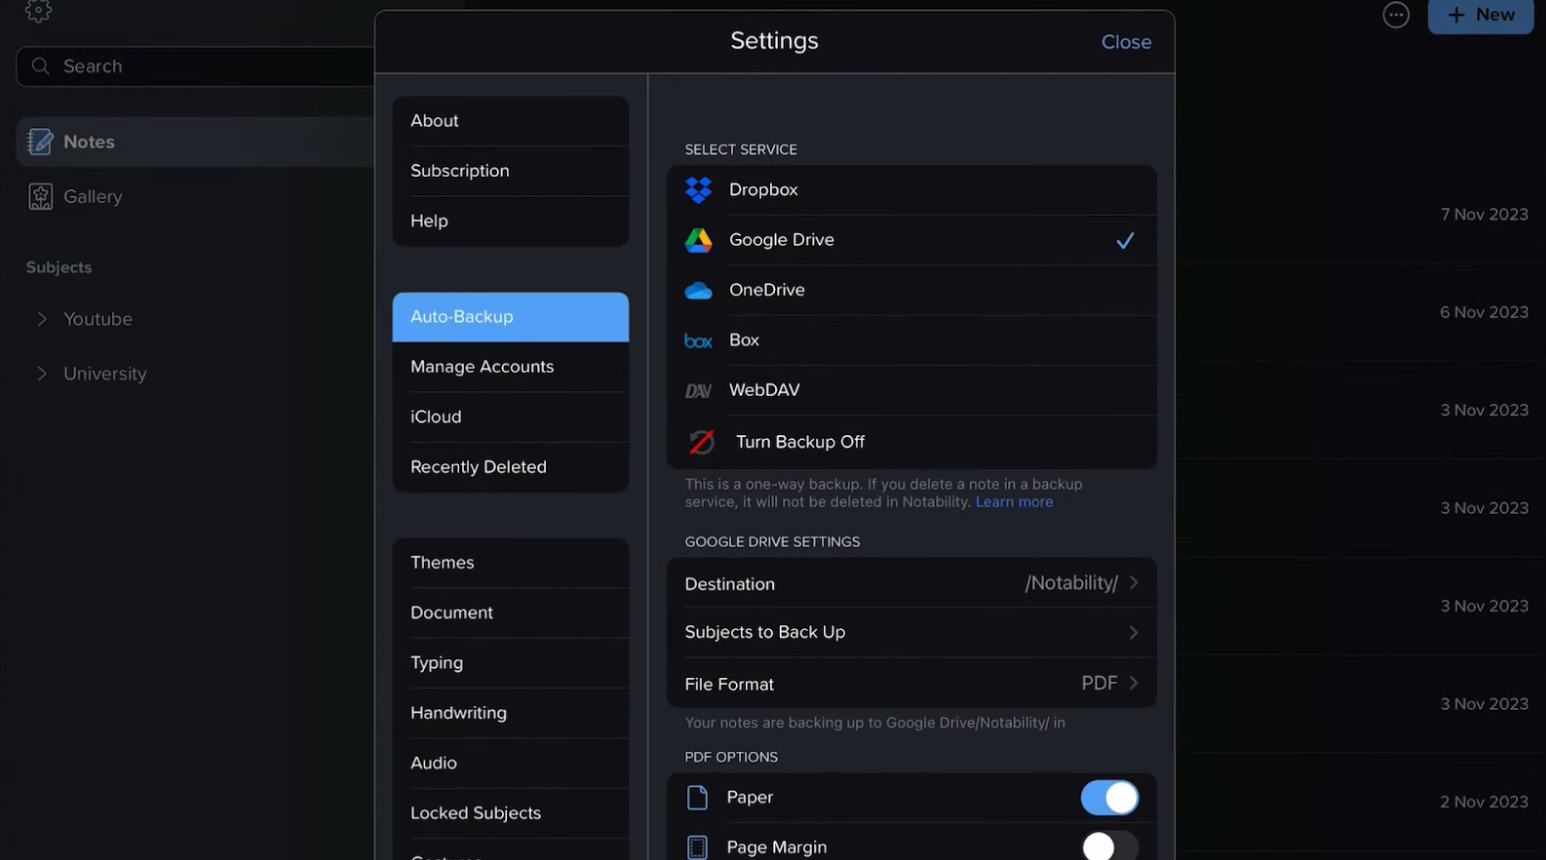
Auto Backup
Whether you are getting Notability for Windows or for your iPad, I personally recommend everyone to switch on auto backup first. Once I forgot to take backup due to which all my documents got lost and all my hard work went in vain. I personally use Google Drive, but you can use what you want.
iCloud
By enabling iCloud, users can access their notes across all their Apple devices (iOS, iPadOS, macOS, VisionOS).
Themes
Notability allows you to change your app themes. The app itself has multiple theme presets including: Dark, White, Dark Blue, or whatever your mood likes.
Documents
In this section you can change default document settings. For example, if you wish to include date or time on your notes, you can do it from here. Similarly, you can change your notes default template from here or set a new default note view (“seamless” or “single page”), or change the text box’s pattern (rule, grid, plain, or dotted), along with color, line spacing, and other settings.

Typing
In this setting you can change your default font and its size and also can enable “Check spelling” (by default it is enabled).
Handwriting
Language: Users can change the default language of their notes, so, it’s easy to detect it in the handwritten notes.
Palm detection: By switching on palm detection, you can rest your palm on your iPad screen and write in peace. However, when this setting is off, Notability may react to your palm’s movements on the screen.
Shape detection: By enabling this feature, you can draw rough shapes with your Apple pencil, and the Notability app will recognize your drawing to create the closest perfect shape.

Audio
This is the Audio Transcription option that allows you to create transcripts for the recorded voices in Notability.
Lock Subjects
By using this setting you can set up a password for a particular subject.
Gestures
With the help of this you can add short cuts for performing the following actions:
Undo/Redo
- 2 Finger Tap- 2 finger tap to undo, 3 finger tap to redo
- 3 Finger Tap- 3 finger swipe left to undo, 3 finger swipe right to redo
Zoom
You can enable “Tap and hold Zoom Mode” to enter zoom mode while handwriting. The gesture is: “tap and hold.” Personally, I don’t use it.
Notability Learn
Learn is the new AI feature of Notability that came in its recent updates. With this feature, you can create a summary of your notes and audio transcripts in a few seconds with the help of generative AI and you can also create interactive quizzes through your notes to revise them. However, to create a summary and quizzes, your notes should have enough content.
How to use Notability Learn?
To make a summary you just need to open the note and click the Notability Learn option on the right side of the toolbox.
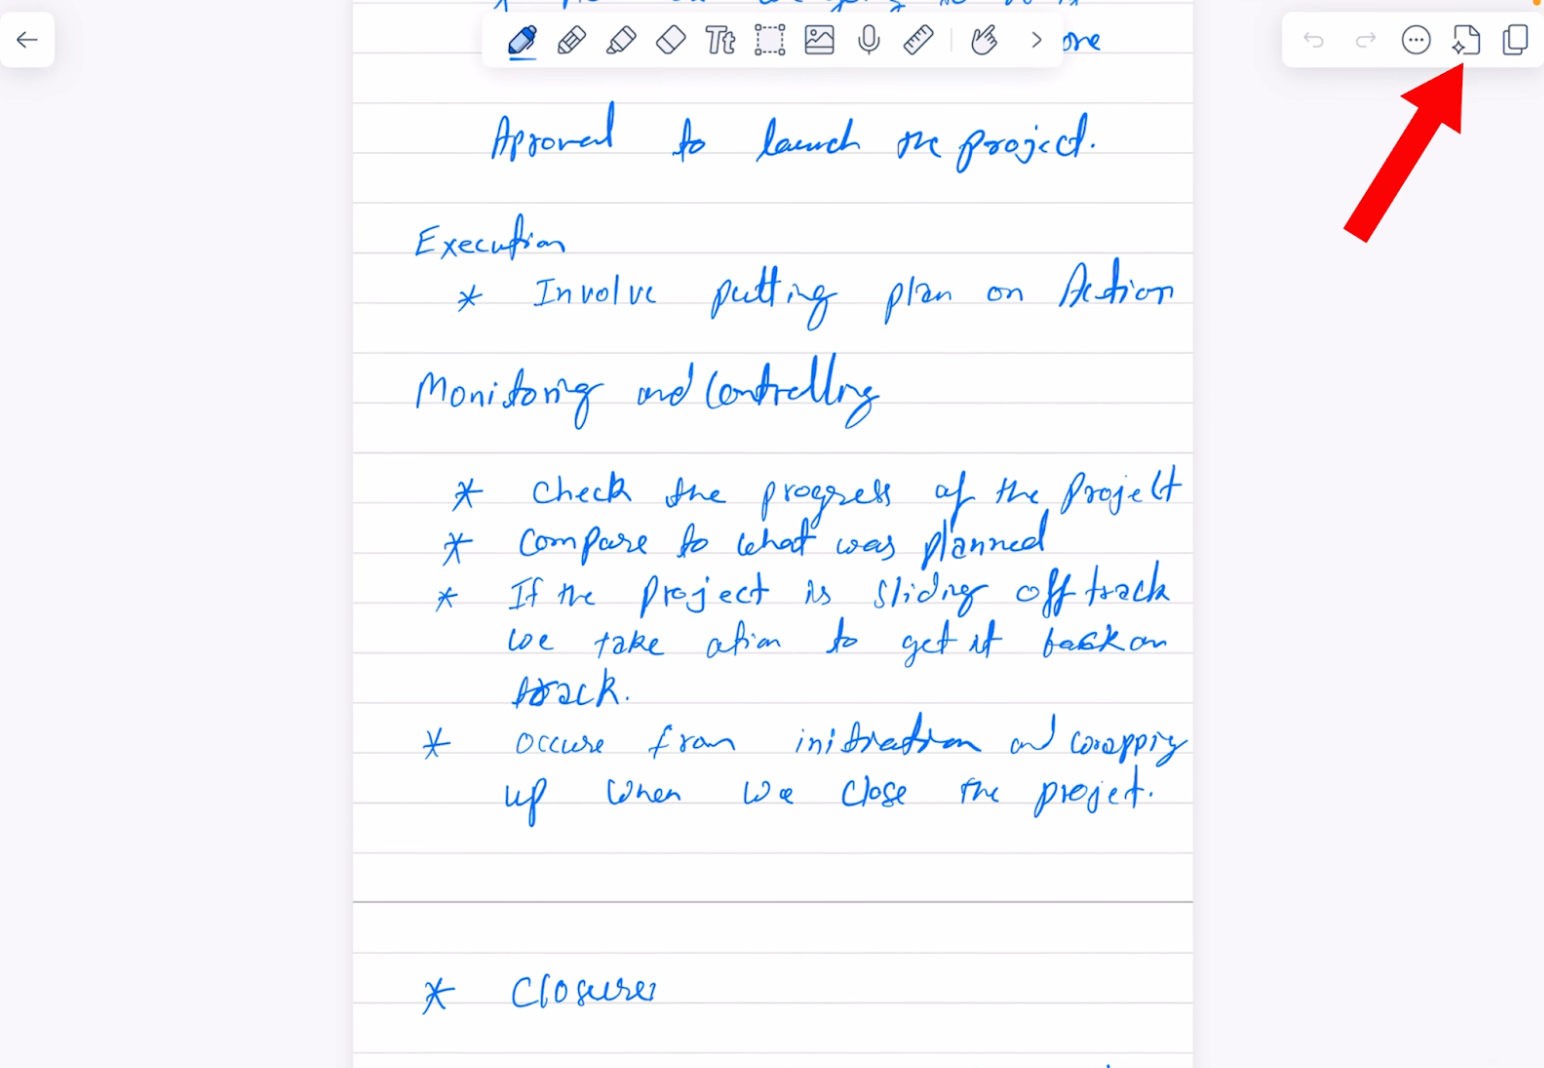
After clicking, Notability will start creating your note’s summary, at the end of which, you will find an option “Study Method,” after which, you will get to choose between Flashcards and Quiz.
Notability Learn is one of my favorite features of this app. Earlier, I used to take a lot of time to summarize my notes, but now it is done in just a click, allowing me to quickly revise all topics, by also taking a quiz. I really enjoy this part. It feels like I’m playing a game.
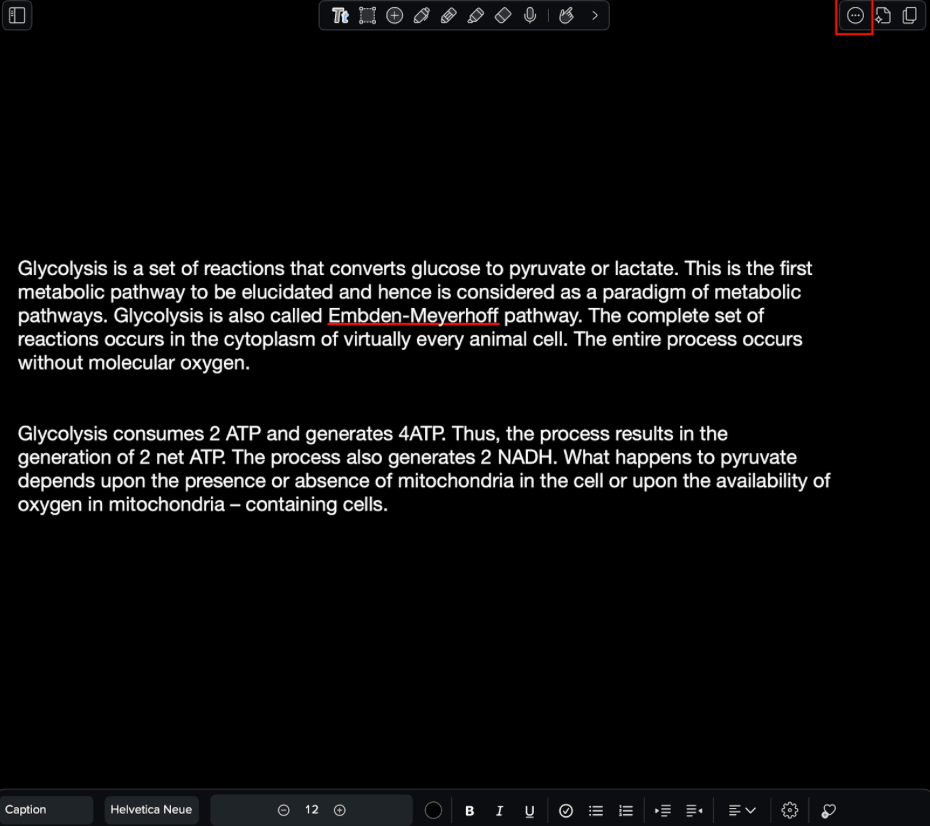
Share and Save Your Notes
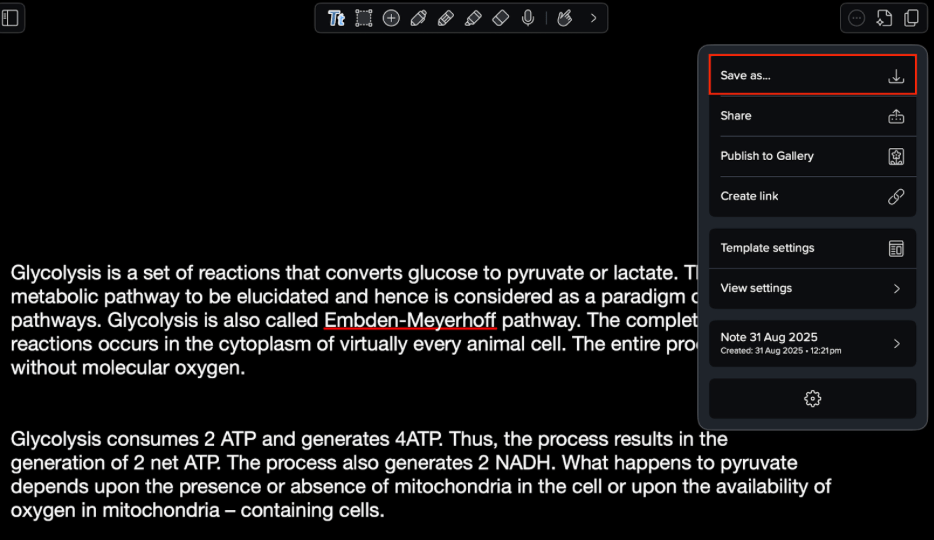
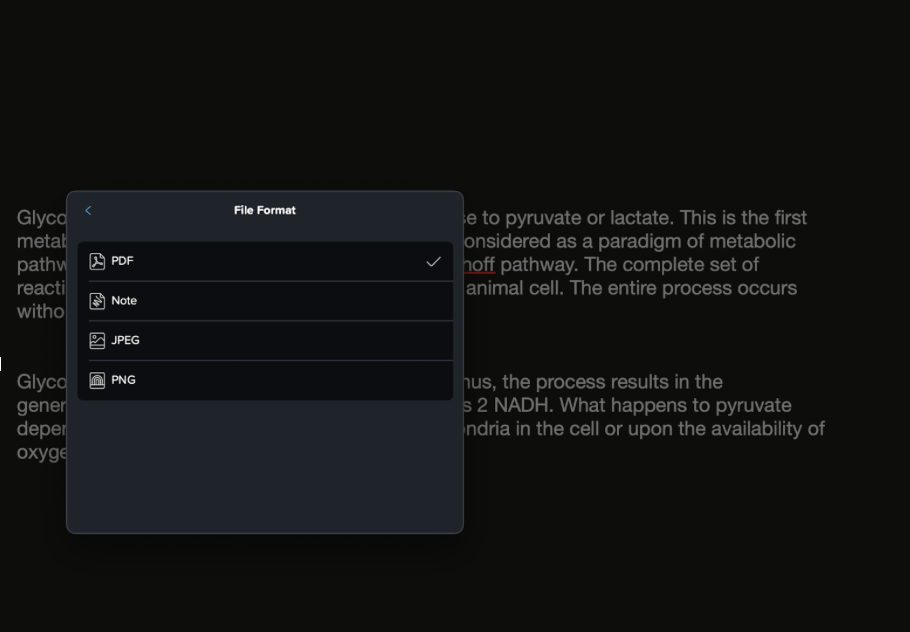
To share and save your document, just click on the three dots in a circle on the top right corner and save it in different formats such as PDF, Note, JPEG, or PNG. You can also copy the link of these documents to share with your friends and colleagues, or publish your own templates in the Notability Gallery.
FAQs
How to Undo in Notability on Mac?
You can use a simple standard shortcut “command + z” to do this or you can also use the arrow present on the right corner of your screen in the Notability app.
How to export audio recordings in notability?
You can export your audios via a Notability zip file that includes your audio, but you can’t export it directly.
How to create hyperlinks in Notability?
To create hyperlinks in Notability you can follow these steps –
- Open your notes in Notability.
- Select Text tool and simply type or paste your link.
- After typing or pasting the link Notability will automatically recognise the link address and convert it to a clickable link.
How to export notes from Notability?
Follow the given steps to export notes from Notability –
- Open your notes.
- Click on the three dots button present at the top right corner.
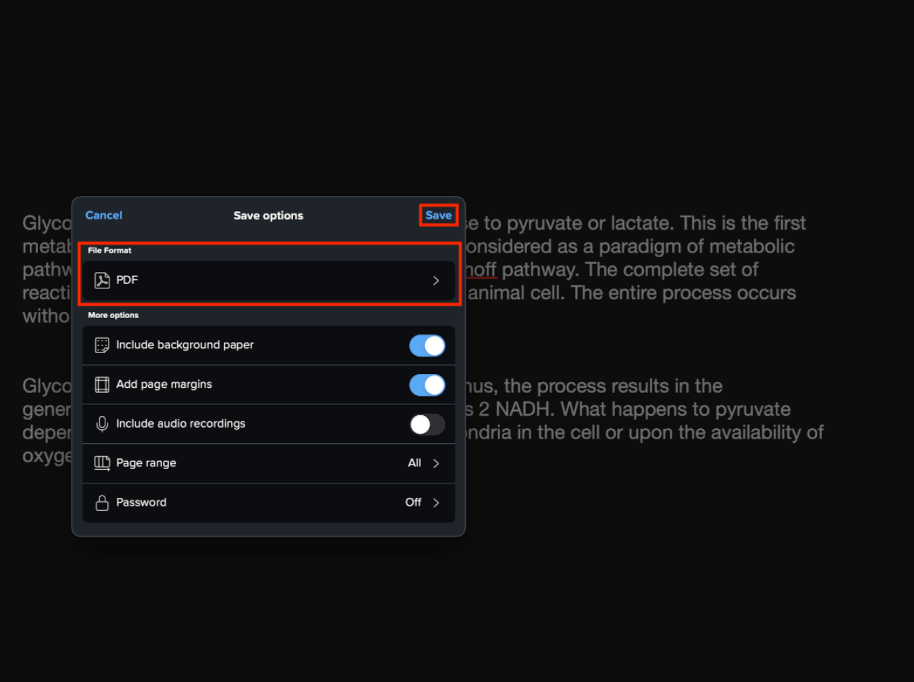
- Now go to “Save as” and choose the file format and click on the “Save” button, after that your notes will be exported successfully.